Contents:
- Why Your Hair Brush Needs Regular Cleaning
- How to Clean Hair Brush: Step-by-Step Methods
- Method 1: The Weekly Deep Clean (Takes 15 Minutes)
- Method 2: The Quick Daily Refresh (Takes 2 Minutes)
- Method 3: The Vinegar Soak for Heavy Buildup (Takes 30 Minutes Active Time)
- Choosing the Right Cleaning Products
- Essential Items You Probably Already Have
- Products to Avoid
- Different Brush Types: Tailored Cleaning Approaches
- Paddle Brushes
- Round Barrel Brushes
- Fine-Tooth Combs
- Wooden-Handle Brushes
- Natural Bristle Brushes
- What the Pros Know
- Storage Tips for Small Spaces
- Signs Your Brush Needs Immediate Cleaning
- Frequently Asked Questions
- How often should you clean a hair brush?
- Can you use hot water to clean a hair brush?
- Is it bad to share hair brushes?
- What’s the difference between cleaning a paddle brush and a round brush?
- Can you use denture tablets to clean a hair brush?
- Moving Forward with Cleaner Hair Care
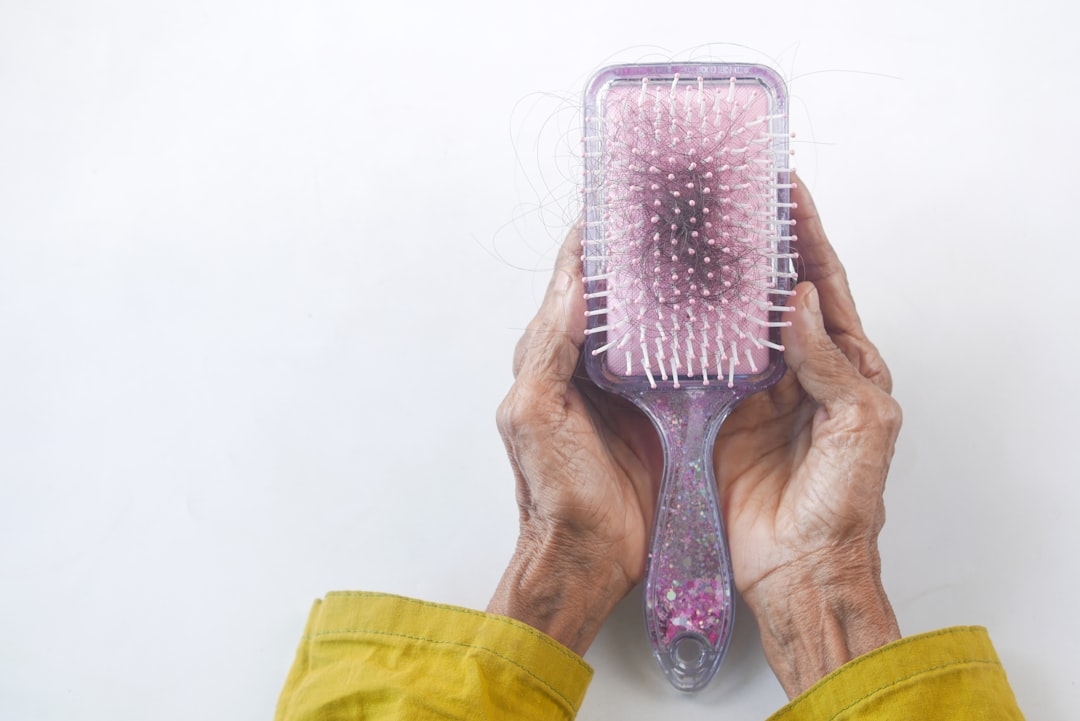
Most people use their hair brush every single day, yet the average hair brush goes months without a proper cleaning. Research suggests that a hair brush can harbour up to 40% of its weight in dead skin cells, dust, and product residue—that’s roughly equivalent to carrying around a second, invisible layer of grime with every brushstroke through your hair. If you’ve ever noticed your brush looking dull or your hair feeling somehow less fresh after styling, that buildup might be the culprit.
Your hair brush is one of the most frequently used tools in your grooming routine, but it’s often one of the most neglected. Whether you’re living in a tight London flat or a small studio, knowing how to clean hair brush properly doesn’t require fancy equipment or much space. It’s a simple habit that transforms both your hair’s appearance and the longevity of your tools.
Why Your Hair Brush Needs Regular Cleaning
Every time you brush your hair, you’re not just detangling—you’re also collecting loose strands, dead skin cells from your scalp, and remnants of whatever products you’ve used that day. If you use heat protectants, dry shampoo, styling sprays, or leave-in conditioners, these accumulate quickly on your brush’s bristles and base.
A dirty brush works against your hair’s health in several ways. First, when you brush with product buildup and dead cells tangled in the bristles, you’re essentially redepositing that mess back onto your clean hair. Second, the bristles become less effective at gliding through your hair, leading to more breakage and frizz. Third, bacteria and fungi can thrive in that moist, organic environment, potentially transferring to your scalp and causing irritation.
People often notice that their hair looks dull or feels greasy faster when they use a dirty brush. That’s not coincidence—it’s your brush adding back what you’ve worked to remove during washing.
How to Clean Hair Brush: Step-by-Step Methods
Method 1: The Weekly Deep Clean (Takes 15 Minutes)
This is your standard maintenance routine. Do this once weekly, or more frequently if you use a lot of styling products.
- Remove loose hair. Start with your brush dry. Use an old toothbrush, a fine-tooth comb, or your fingers to pull out all the loose hair wound around the base. For a compact flat, this is the easiest first step since you’re not creating a wet mess.
- Prepare your soak. Fill a mug, bowl, or even a large drinking glass with lukewarm water. Add one tablespoon of baking soda and a few drops of shampoo or washing-up liquid. If your brush is heavily product-laden, increase the baking soda to two tablespoons. The baking soda breaks down oils and buildup, whilst the soap lifts residue.
- Submerge and wait. Place your brush bristles-down in the water for 10-15 minutes. If your brush has a wooden handle or special backing, try to keep those parts out of the water to avoid damage.
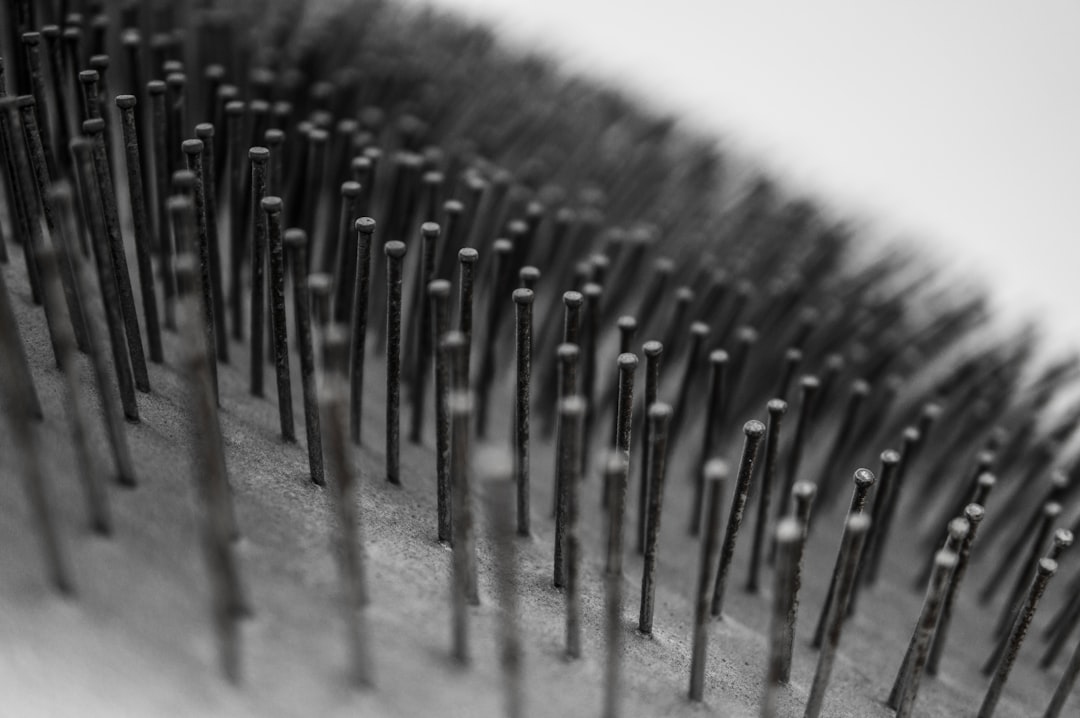
- Scrub gently. Use an old toothbrush to scrub between the bristles and along the base where gunk collects. Pay extra attention to the area where the bristles meet the backing—this is where bacteria loves to hide.
- Rinse thoroughly. Hold the brush under cool running water until all soapy residue is gone. Bristles should feel clean and slightly slippery, not sticky.
- Air dry properly. Stand your brush bristles-up in a cup or jar so air circulates all around. Never lay it bristles-down on a surface, as moisture trapped underneath will encourage mildew. Drying takes 2-4 hours depending on your brush’s density and your home’s humidity.
Method 2: The Quick Daily Refresh (Takes 2 Minutes)
Between deep cleans, a quick refresh prevents hair and loose debris from accumulating. This method works brilliantly when you’re short on time or living in a space where water access is limited.
- Remove loose hair immediately after styling. Don’t wait until the next morning—pull out strands whilst they’re still easy to release. This prevents them from drying and setting into the bristles.
- Wipe with a cloth. Use an old microfibre cloth, soft cloth, or even a coffee filter to wipe across the bristles. This removes surface dust and product particles.
- Optional: spray with diluted vinegar solution. Mix equal parts white vinegar and water in a spray bottle. Lightly mist your brush and wipe again. Vinegar kills bacteria naturally without needing a soak. Store the solution in a dark bottle, as vinegar degrades in light.
Method 3: The Vinegar Soak for Heavy Buildup (Takes 30 Minutes Active Time)
Use this method monthly, or whenever your brush looks especially dull or feels sticky despite recent cleaning.
- Remove loose hair first. Don’t skip this—it makes everything else easier.
- Fill a container with white vinegar. You need enough to submerge the bristles. White vinegar is inexpensive (usually under £1 per litre at UK supermarkets in 2026) and fights both bacteria and mineral deposits from hard water.
- Soak for 20-30 minutes. The acidity dissolves stubborn buildup that baking soda alone can’t shift. Your brush will smell strongly of vinegar—this is normal and will fade once dry.
- Scrub the base and bristles. Use your toothbrush to work between bristles and around the backing.
- Rinse and dry. Rinse several times under cool water to remove the vinegar smell. Air-dry bristles-up as described above.
A reader named Sarah, who lives in a studio flat in Bristol with minimal storage, shared her breakthrough moment: “I realised my hair looked significantly better within a week of cleaning my brush properly. I’d been using dirty brushes for so long I’d forgotten what healthy-looking hair felt like. Now I spend 15 minutes on Sundays, and my hair’s texture has genuinely improved.” This shift from accepting “dull hair” to investing a few minutes in maintenance changed her entire approach to grooming.
Choosing the Right Cleaning Products
You don’t need to buy specialty brush-cleaning products. Your kitchen likely contains everything necessary.
Essential Items You Probably Already Have
- Baking soda: The MVP of brush cleaning. It’s alkaline, so it breaks down acidic oils and stubborn residue. A 500g box costs about 60p and lasts for dozens of cleanings.
- White vinegar: Naturally antibacterial and cuts through mineral deposits. A 1-litre bottle is around 70p.
- Washing-up liquid: Standard dish soap works perfectly. You need only a small drop.
- An old toothbrush: Your replacement toothbrush or a genuinely old one is perfect for scrubbing between bristles.
- Hot water: Lukewarm water is fine for regular cleaning. Reserve hot water for very heavy buildup, as extreme heat can damage some brush types.
Products to Avoid
Harsh bleach, acetone, or alcohol-based cleaners can damage bristles and strip natural oils from wooden handles. Boiling your brush is tempting but risks damaging the backing and bristles, especially if they’re synthetic or glued in place.
Different Brush Types: Tailored Cleaning Approaches
Paddle Brushes
The flat, wide surface collects debris across a large area. The standard baking soda soak works excellently for paddle brushes. Pay extra attention to the base where the bristles meet the backing—this is where moisture and bacteria accumulate. Drying time: 3-4 hours due to the dense bristle pack.
Round Barrel Brushes
The circular design concentrates dirt around the bristles. Use your toothbrush to work between each row of bristles. If your round brush has a plastic core, ensure it’s completely dry before using heat styling tools again. Drying time: 2-3 hours.
Fine-Tooth Combs
The narrow spacing means buildup hides between teeth. Soak these separately in the baking soda solution, then use a fine-tooth toothbrush or old eyebrow brush to clean between each tooth. Drying time: 1-2 hours.
Wooden-Handle Brushes
Keep wooden handles out of prolonged water exposure. Use the baking soda method but keep water contact brief. Dry immediately and thoroughly to prevent the wood from absorbing moisture and warping. If your brush has a waxed handle, it’s more water-resistant than unfinished wood.
Natural Bristle Brushes
Boar or horse hair bristles are delicate. Clean more gently and avoid scrubbing vigorously. The baking soda soak is gentler than vinegar for these luxury brushes. Many high-end natural bristle brushes cost £15-40, so extra care pays off.
What the Pros Know
Salon professionals often clean their brushes between clients. They know that a clean brush makes hair look shinier and smoother because it’s not redistributing buildup. Many hairdressers use a small basin with warm water, a squirt of shampoo, and a dedicated brush cleaning tool (essentially a firm comb for bristles). They air-dry over a towel, bristles-up, and often keep their most frequently used brushes on a rotation—three to five brushes means one is always drying whilst the others are in use. This professional approach prevents any single brush from sitting wet too long, which is where mildew begins. For someone in a small flat, the principle is the same: if you have just one or two brushes, a consistent deep clean weekly prevents the problem from building up.
Storage Tips for Small Spaces
Living in a compact flat means every centimetre counts. Store your brushes in a way that prevents moisture and allows air circulation.
- Use a small cup or jar. Stand brushes bristles-up in a mug or repurposed jam jar. This keeps them off surfaces and lets air flow around them.
- Hang them if possible. A small suction hook on your bathroom mirror can hold a paddle brush. A tension rod under the sink can hold several fine-tooth combs with clips.
- Keep them separate from other tools. If your toothbrush is nearby, make sure your hair brushes are clearly separated to avoid confusion and contamination.
- Use a small mesh bag. If you travel frequently or have very limited bathroom space, a small drawstring mesh bag lets brushes air-dry even whilst stored. Hang it on a door hook or towel rail.
Signs Your Brush Needs Immediate Cleaning
- Visible matted hair around the base. Strands have knotted together and begun to dry into the bristles.
- A sticky or filmy feeling when you run your finger across the bristles. This indicates product and dead cell buildup.
- Bristles don’t glide smoothly. Instead of flowing through hair, they snag or pull.
- A musty or unpleasant odour. This suggests bacterial or fungal growth.
- Visible discolouration or dull, grey appearance. The bristles have accumulated enough grime that the original colour is obscured.
Frequently Asked Questions
How often should you clean a hair brush?
Clean thoroughly once weekly for regular use, or every 4-5 days if you use many styling products. Do a quick hair removal daily. If you notice visible buildup, don’t wait—clean immediately. Environmental factors matter: humid climates require more frequent cleaning to prevent mildew.
Can you use hot water to clean a hair brush?
Lukewarm water is best. Very hot water can loosen glue holding bristles in place or warp wooden handles. If you’re dealing with heavy wax or product buildup, water between 40-50 degrees Celsius is warm enough to help dissolve oils without risking damage.
Is it bad to share hair brushes?
Sharing transfers bacteria, fungal spores, and potential scalp conditions. Even with frequent cleaning between uses, it’s not hygienic. Each household member should have their own brush. Clean yours regularly, clean theirs regularly, and keep them separate.
What’s the difference between cleaning a paddle brush and a round brush?
Paddle brushes have a wide, flat backing with densely packed bristles. Soak them longer and scrub thoroughly between bristles. Round brushes have a circular structure where buildup accumulates in the centre. Work your toothbrush vertically between the rows. Both benefit from the same soak method, but round brushes need more attention to internal crevices.
Can you use denture tablets to clean a hair brush?
Yes. Denture tablets are designed to break down organic buildup and kill bacteria. Dissolve one tablet in warm water and soak your brush for 15-20 minutes, then scrub and rinse. They’re effective but cost more than baking soda (around £3-4 for a pack), so they’re best reserved for occasional deep cleans rather than weekly use.
Moving Forward with Cleaner Hair Care
The habit of regularly cleaning your hair brush is small, but the payoff is tangible. Healthier-looking hair, longer-lasting tools, and reduced scalp irritation are worth those 15 minutes once a week. Your brush is an investment in your appearance—maintain it like you would any other tool, and it will serve you better.
Start this week. Pick your preferred method—the baking soda soak is easiest for most people—and commit to one weekly cleaning session. Within a fortnight, you’ll notice your hair looks shinier and feels smoother. That’s not placebo. That’s what happens when you remove months of buildup that was sitting between your hair and your styling tool.
Small spaces don’t require small effort in personal care. They require smarter systems. A clean brush standing in a cup on your bathroom shelf takes up the same space as a dirty one, and works infinitely better. Make the switch today.