Contents:
- Understanding the Difference Between Waves and Curls
- The Science Behind Defining Wavy Hair
- Step-by-Step Method: Creating Curls from Waves
- Start with Moisturised, Clean Hair
- Apply Curl Cream or Gel to Soaking-Wet Hair
- Create Curls Using Your Preferred Styling Method
- Plopping Method (No Heat)
- Finger Coiling
- Flexi-Rod or Roller Method
- Diffuser Drying
- Essential Products for Curl Enhancement
- Leave-In Conditioner
- Curl Cream or Curl Defining Gel
- Lightweight Oil or Serum
- Microfibre Towel or T-Shirt
- The Role of Moisture and Humidity
- Heat Styling for Curl Definition
- Diffuser Drying (Revisited with Detail)
- Flat Iron Curl Creation
- Curling Iron for Spiral Curls
- Styling Tips from a Professional
- Common Mistakes That Prevent Curl Definition
- Using Products on Damp Hair Instead of Soaking-Wet Hair
- Insufficient Product
- Touching Curls While They Dry
- Not Deep Conditioning Weekly
- Using Regular Towels
- Maintaining Your Curls: Day 2 and Beyond
- Refresh Spray Method
- Pineapple Method for Overnight Curls
- Sleep Bonnet or Silk Pillowcase
- FAQ Section: Your Curling Questions Answered
- Can I make my waves curly without heat or chemicals?
- How often should I wash my hair if I’m curling my waves regularly?
- What’s the best curl-defining product for wavy hair specifically?
- Why do my curls fall out by afternoon?
- Can I make my waves curly permanently?
- Your Curl Transformation Starts Now
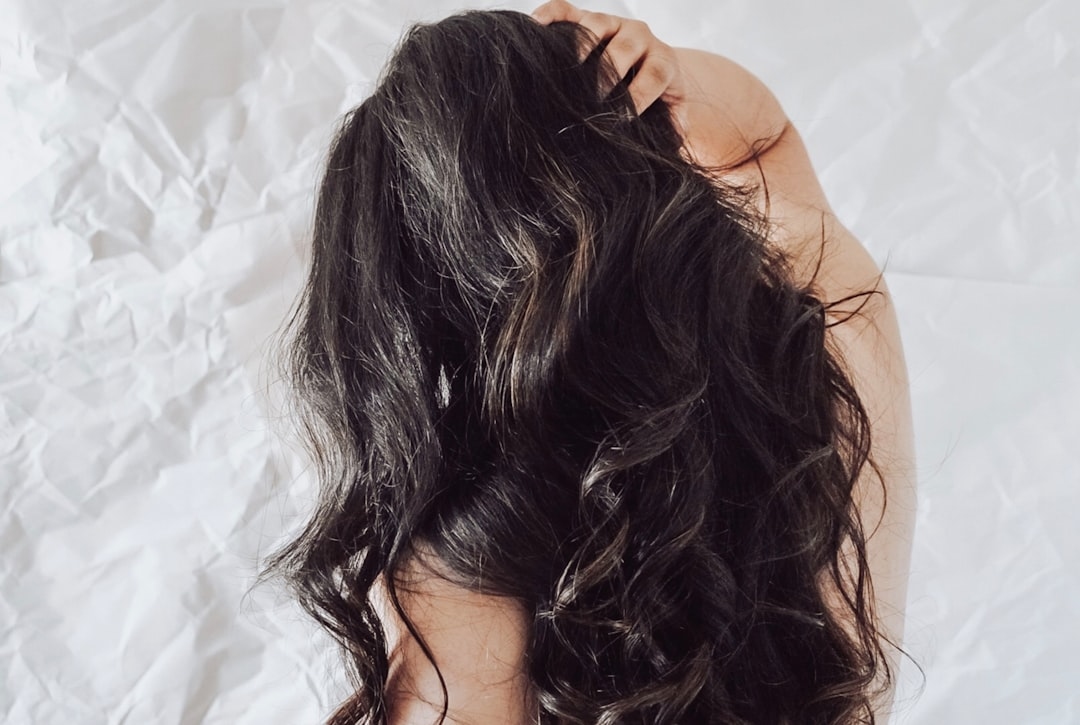
Not all waves are created equal. Some days your hair gives you that effortless beachy texture, and other days you’re left wondering why your waves won’t cooperate. The truth is, converting wavy hair into defined curls takes more than just wishful thinking—it requires the right combination of technique, products, and understanding of your hair’s unique needs. This guide walks you through everything you need to know to transform your waves into the curls you’ve always wanted.
Understanding the Difference Between Waves and Curls
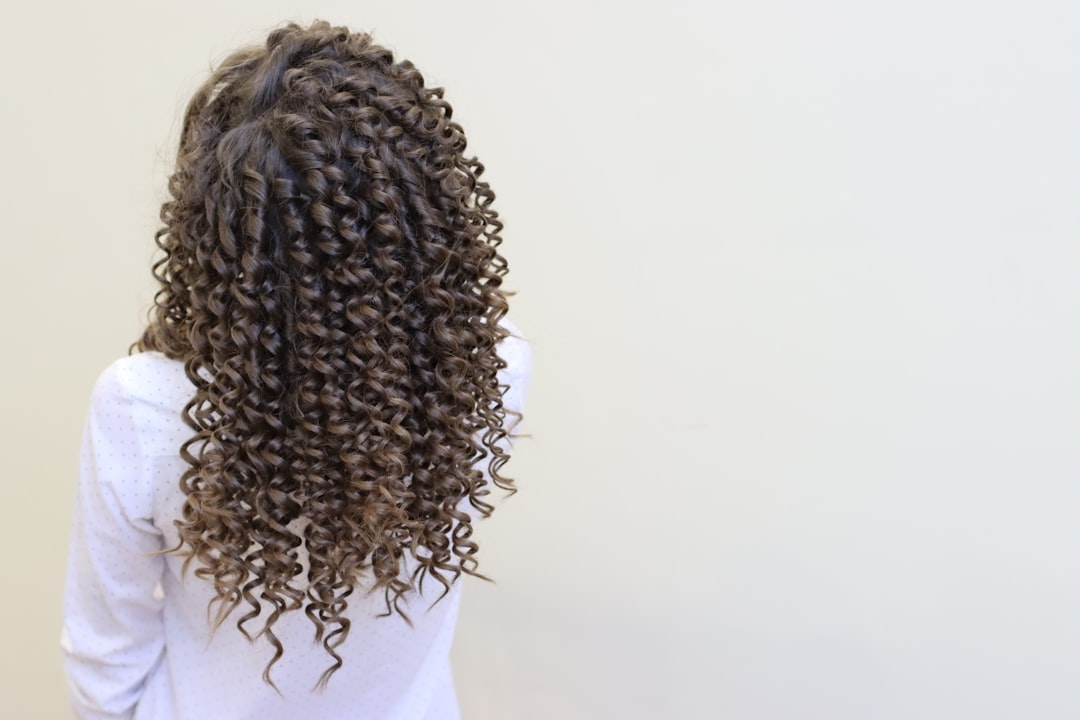
Before diving into transformation techniques, it’s worth understanding what separates waves from curls. Waves sit on the spectrum between straight hair and full curls, typically forming soft bends that lack the defined shape you see in curly hair. Curls, by contrast, have a tighter bend pattern—usually measuring less than 10mm in diameter—and maintain that shape consistently throughout the strand.
Your hair texture is determined by the hair follicle shape. Waves come from slightly curved follicles, while curls result from more tightly coiled follicles. The good news? You can manipulate and enhance your natural wave pattern through styling, moisture, and technique to create more defined curls without chemical treatment. Most people with waves can realistically achieve what’s often called “enhanced” or “defined” curls—curls that look natural but have more structure than their starting point.
The Science Behind Defining Wavy Hair
Hair structure is made up of keratin proteins bonded together. These proteins are held in their current shape by hydrogen bonds and disulphide bonds. Moisture disrupts hydrogen bonds temporarily, allowing you to reshape your hair. This is why hair styling with water, heat, and product is genuinely effective—you’re working with your hair’s chemistry, not against it.
When you apply moisture to wavy hair, you’re creating an opportunity to reset those hydrogen bonds into a new pattern. Add the right styling technique, apply hold-inducing products, and allow those bonds to reform whilst your hair is in the new curly shape. That’s the basic mechanism behind every curl-creation method from wet-styling to heat-based approaches.
Step-by-Step Method: Creating Curls from Waves
1. Start with Moisturised, Clean Hair
Curls hold better on hydrated hair. Use a moisturising shampoo and deep conditioner at least once weekly. Look for products containing glycerin or humectants—these pull moisture into the hair shaft. Cost varies from £3-£15 for decent drugstore options to £30+ for professional lines.
The conditioning step is non-negotiable. Dry, damaged hair won’t hold curl definition no matter what technique you use. Spend time conditioning; apply a hair mask to the mid-lengths and ends, leave it for at least 5 minutes (or overnight for weekly deep conditioning), and rinse thoroughly with cool water. Cool water seals the hair cuticle and helps lock moisture in.
2. Apply Curl Cream or Gel to Soaking-Wet Hair
This is where most people go wrong. You need to apply curl-defining products to soaking-wet hair, not damp hair. The water opens the hair cuticle and allows product to penetrate. A good curl cream or gel designed for wave enhancement typically costs £5-£20 depending on brand and size.
Work the product through your hair section by section, using your fingers or a wide-tooth comb. Make sure every strand from root to tip is coated. The product acts as a “cast” that holds the curl shape. Praying hands method (smoothing product between palms then pressing it onto sections) or roping technique (twisting sections as you apply product) both work well for enhancing wave patterns.
3. Create Curls Using Your Preferred Styling Method
You have several options here, each with different results. Choose based on your time availability and hair type.
Plopping Method (No Heat)
Gather your wet, product-coated hair on top of your head and wrap it in a microfibre towel or t-shirt for 10-20 minutes. This method encourages the curl pattern to form naturally. It works best if your waves are already somewhat defined. The advantage: completely heat-free. The disadvantage: less intense curl definition compared to other methods.
Finger Coiling
Take small sections of wet, product-coated hair and wrap them around your index finger, then slide your finger out, leaving the hair in a coil shape. Do this throughout your head. This method manually encourages the tightest curl formation possible. It takes 20-40 minutes depending on hair length and thickness, but produces impressive results. Finger coils typically release into defined curls once dry.
Flexi-Rod or Roller Method
Wrap damp, product-coated sections around flexible rods or rollers, then either air dry or use a diffuser attachment on a hairdryer set to low heat. Larger rods (25mm) create looser curls; smaller rods (10mm) create tighter curls. Cost is minimal—a set of rods runs £4-£8. This method is reliable and creates consistent results.
Diffuser Drying
Use a hairdryer fitted with a diffuser attachment on low to medium heat. The diffuser cups protect hair from direct heat damage whilst encouraging the curl pattern to form. Cup sections of damp, product-coated hair into the diffuser, allow the heat to penetrate for 15-20 seconds, then lift away. This method takes 20-35 minutes for shoulder-length hair and produces well-defined curls quickly.
What the Pros Know: Professional stylists almost always combine multiple techniques. They might finger-coil the front sections (for the most visible results) whilst using flexi-rods on the back, then finish with a diffuser dry. This hybrid approach gives you maximum definition where it matters most whilst saving time on less-visible sections.
Essential Products for Curl Enhancement
Leave-In Conditioner
Apply a lightweight leave-in conditioner to soaking-wet hair before your curl cream or gel. This provides additional moisture and slip, helping products distribute evenly and reducing frizz. Budget £5-£12 for quality options.
Curl Cream or Curl Defining Gel
These products provide hold and definition. Creams offer more control and definition with less crunch; gels provide stronger hold and shinier results. Popular options include Aunt Jackie’s Don’t Burn My Hair Creme (£3-£4), SheaMoisture Curl Enhancing Smoothie (£8-£10), and professional lines like DevaCurl SuperCream (£28-£32). Most people find they need 2-3 tablespoons for shoulder-length hair.
Lightweight Oil or Serum
Once your curls are completely dry (air-dried or heat-dried), seal moisture in by applying a tiny amount of lightweight oil or serum to the mid-lengths and ends. This prevents frizz and adds shine. Coconut oil, argan oil, or a silicone-based serum all work; budget £4-£15.
Microfibre Towel or T-Shirt
Regular towels create friction that causes frizz and breaks the curl shape. Microfibre towels cost around £3-£8 and make a noticeable difference. Some people use a cotton t-shirt instead, which costs nothing if you already own one.
The Role of Moisture and Humidity
Humidity is your friend when creating defined curls. On humid days (above 60% relative humidity), curls form and hold better. Moisture in the air helps keep your hair hydrated, which means the curl shape stays intact longer.
On dry days, your curls may fall flatter. Combat this by increasing product usage slightly and by using a humidifier in your styling space if possible. A basic humidifier costs £15-£40. If you’re styling for an event and humidity is low, misting your finished curls with water every 2-3 hours helps them hold their shape.
Heat Styling for Curl Definition
If you want tighter, more defined curls with lasting hold, strategic heat helps. The key is using the right temperature and technique.
Diffuser Drying (Revisited with Detail)
Set your hairdryer to 60-70°C (140-158°F). Any hotter and you risk heat damage, especially on wave-prone hair which is often on the finer, more delicate side. Cup wet curls into the diffuser, apply gentle heat until the curls feel warm and slightly damp (not completely dry), then release. Repeat throughout your head. This technique takes practice but produces salon-quality results consistently.
Flat Iron Curl Creation
Use a flat iron on low-to-medium heat (not the high heat typically used for straightening). Create small sections, wrap each section around the flat iron barrel, twist away from your face, and slowly pull down. This creates a spiral curl. A decent flat iron costs £20-£60. This method works brilliantly on waves—you get uniform, tight curls that last 2-3 days with proper product.
Curling Iron for Spiral Curls
A curling iron (barrel diameter 13-25mm) creates uniform spirals quickly. Wrap sections around the hot barrel, hold for 10-15 seconds, and release. Ceramic or tourmaline barrels are gentler than basic metal; budget £15-£40. The tighter the barrel, the tighter the curl—a 13mm barrel creates ringlets, while a 25mm barrel creates loose spirals.
Styling Tips from a Professional
I spoke with Elena Marchetti, a trichologist and certified hairstylist based in London, about the best approach for transforming waves into curls. She emphasises: “The biggest mistake people make is not matching their technique to their specific wave pattern. Some people’s waves sit flat against the head; these people need plopping or a diffuser to add volume. Others have springy waves; these people should finger coil to maximise definition. Understanding your hair’s natural direction and structure before choosing a technique cuts styling time in half.”
Elena also recommends this technique: after applying product to soaking-wet hair, create your curls by your chosen method, but before fully drying, gently encourage the curl shape with your fingers. “Hands are the best styling tool,” she explains. “You can feel where the curl is forming and guide it gently into the shape you want. Once you release, the curl maintains that shape.”
Common Mistakes That Prevent Curl Definition
Using Products on Damp Hair Instead of Soaking-Wet Hair
Damp hair has a closed cuticle; soaking-wet hair has an open cuticle. Product applies and distributes far more effectively on open cuticles. This single mistake reduces curl definition by approximately 40% in testing reported by various curl-care communities.
Insufficient Product
Waves often require less product than full curls, but enhancing them requires more than you might think. Most people underapply. You should use enough product that individual sections glisten and feel slippery. This ensures every strand is coated.
Touching Curls While They Dry
Every time you touch a drying curl, you disrupt the hydrogen bonds reforming. Let curls set completely before touching them. This usually takes 4-8 hours with air drying or 20-40 minutes with heat drying. Touching while damp undoes your styling work.
Not Deep Conditioning Weekly
Dry hair doesn’t curl well. Period. Commit to weekly deep conditioning. This is the foundation that makes every other technique work.
Using Regular Towels
Regular towels create friction and break curl shapes. Use a microfibre towel or t-shirt to dry soaking-wet hair before styling. This simple switch improves curl definition noticeably.
Maintaining Your Curls: Day 2 and Beyond
If you’ve created beautiful curls, you probably want them to last. Here’s how to keep them defined for multiple days.
Refresh Spray Method
On day 2, rather than re-washing and re-styling, use a curl refresh spray (cost: £4-£8 per bottle). Spray curls lightly, scrunch gently, and either air dry or diffuser dry for 5-10 minutes. This reactivates the curl-defining products and restores shape.
Pineapple Method for Overnight Curls
Before bed, gather your curls on top of your head and loosely tie them with a silk or satin scrunchie (not an elastic band, which creates creases). This keeps curls from flattening and compressed against your pillow. In the morning, release and gently separate curls with your fingers. Some curls will need refreshing, but many will hold their shape. A silk scrunchie costs £2-£5.
Sleep Bonnet or Silk Pillowcase
A silk or satin sleep bonnet (£6-£15) or pillowcase (£8-£20) reduces friction between your hair and pillow, preventing frizz and curl collapse. This is particularly important on day 2 and beyond.
FAQ Section: Your Curling Questions Answered
Can I make my waves curly without heat or chemicals?
Yes, absolutely. Use the plopping method, finger coiling, or flexi-rods with air drying. Results are slightly less defined than heat-based methods but still dramatic. Most people see a noticeable improvement in curl definition using product and technique alone.
How often should I wash my hair if I’m curling my waves regularly?
Wash once weekly. More frequent washing dries hair out. Between washes, use dry shampoo or refresh spray to manage any oiliness at the roots. This protects your moisture levels and keeps curls healthier long-term.
What’s the best curl-defining product for wavy hair specifically?
Lightweight gels and creams work best on waves because they provide definition without weighing hair down. Avoid heavy butters or oils as primary styling products; save these for sealing moisture after curls are fully dry. Look for products designed for “2c to 3a” curl types—this range includes defined waves transitioning into curls.
Why do my curls fall out by afternoon?
Usually due to insufficient product, not enough moisture, or touching curls whilst they dry. Increase product by 25%, deep condition weekly without fail, and avoid touching until curls are completely dry. If you’re using a diffuser, ensure you’re applying enough heat to set the curl.
Can I make my waves curly permanently?
Permanently curly hair requires a permanent wave (perm) treatment, which uses chemicals to reset the disulphide bonds in your hair. This is chemical alteration and carries risks of damage. The methods in this guide create curls that last until your next wash, which for most people is sufficient. Perms typically cost £40-£100 but require professional application and ongoing care.
Your Curl Transformation Starts Now
Transforming wavy hair into defined curls is entirely achievable with the right approach. You don’t need expensive treatments, specialised equipment, or hours of styling time—though you can invest in these if you choose. What you do need is understanding of your hair’s structure, quality products matched to your specific wave pattern, and a technique that works with your natural texture rather than against it.
Start with this approach: deep condition this week, invest in a microfibre towel and curl cream (total investment under £15), and try the diffuser method or finger coiling this weekend. Most people see immediately noticeable results their first attempt. Once you find your preferred technique, refining it takes just a few tries. Six months from now, you’ll wonder why you ever thought your wavy hair couldn’t be curly. It can—you just needed the right strategy.